


The DIY wooden storage box market has experienced remarkable growth, with the broader storage solutions sector reaching USD 12349 Million in 2023 and projected to reach USD 27949 Million by 2030, growing at a CAGR of 12.39%. This surge reflects increasing consumer interest in customizable, cost-effective storage solutions that combine functionality with personal craftsmanship satisfaction. Wood segment is anticipated to account for around 47.2% of the U.S. kids storage furniture market share in 2025, driven by rising consumer preference for non-toxic and eco-friendly materials.
Building your own wooden storage box offers significant advantages over commercial alternatives, including complete customization control, superior material selection, and substantial cost savings. Professional-grade wooden storage boxes with lids often retail for $200-800, while DIY construction can achieve similar quality for 30-50% less investment. The satisfaction of creating functional furniture pieces adds intangible value that commercial products cannot match.
This comprehensive guide examines proven construction techniques, material optimization strategies, and professional finishing methods that enable hobbyist woodworkers to create wooden storage boxes rivaling commercial quality. From basic butt joints to advanced dovetail construction, we explore methodologies suitable for varying skill levels and tool availability.
What Tools and Materials Are Essential for Wooden Storage Box Construction?
Successful wooden storage box construction requires careful tool selection and material planning to achieve professional results while maintaining project feasibility within home workshop constraints. Tool requirements vary significantly based on chosen construction techniques and desired quality levels.
Essential Hand Tools for Basic Construction
Quality hand tools form the foundation of successful wooden storage box construction, particularly for hobbyists lacking extensive power tool collections. A sharp handsaw enables accurate crosscuts and rip cuts, though requiring greater skill and patience compared to power alternatives. The key to handsaw success lies in maintaining sharp teeth and proper cutting technique, with 10-12 teeth per inch optimal for general wooden storage box construction.
A reliable square ensures accurate marking and joint verification, critical for boxes requiring precise fits. Combination squares offer versatility for both 90-degree and 45-degree measurements, while speed squares excel for quick layout tasks. Investment in quality measuring tools pays dividends through improved accuracy and reduced material waste.
Sharp chisels enable precise joint cutting and cleanup operations essential for professional results. A basic set including 1/4", 1/2", and 3/4" widths addresses most wooden storage box requirements. Keeping chisels properly sharpened dramatically improves both cutting efficiency and safety, making this skill essential for serious DIY builders.

Power Tool Requirements for Efficiency
Power tools significantly accelerate construction while often improving accuracy over hand tool alternatives. A quality table saw provides the precision and repeatability essential for professional wooden storage chest construction, enabling accurate rip cuts and crosscuts with minimal setup time. Safety features like blade guards and riving knives are non-negotiable for home workshop use.
Router capabilities expand joint options considerably, enabling box joints, dadoes, and decorative edge profiles that distinguish custom work from basic construction. Variable speed control and quality bits are essential for achieving clean cuts in different wood species. A router table further enhances accuracy and safety for small wooden storage boxes.
Random orbital sanders create smooth, consistent surfaces essential for professional finishes. The random sanding pattern minimizes visible scratch marks while aggressive material removal capabilities accelerate surface preparation. Dust collection integration protects both health and workshop cleanliness.

Material Selection Strategies
Wood selection significantly impacts both construction difficulty and final results, making material choice crucial for project success. Pine remains the most economical choice for beginning builders, offering excellent workability and availability while accepting stains and paints readily. However, pine's softness requires careful handling to prevent dents and gouges.
Oak provides exceptional durability and attractive grain patterns ideal for large wooden storage boxes requiring structural integrity under heavy loads. The harder density demands sharp tools and greater care during machining but rewards builders with superior longevity and appearance. Oak's cost premium is often justified for heirloom-quality projects.
Plywood offers dimensional stability and cost efficiency for wooden storage boxes with lids, particularly when appearance panels will be covered or painted. Quality cabinet-grade plywood provides excellent screw holding and consistent thickness, simplifying construction compared to solid lumber variations.

Which Construction Techniques Deliver Professional Results for Different Skill Levels?
Construction methodology significantly influences both the difficulty and final quality of wooden storage box projects. Technique selection should align with available tools, skill level, and desired appearance to maximize success probability while achieving satisfactory results.
Beginner-Friendly Butt Joint Construction
Butt joints represent the simplest approach to wooden storage box assembly, requiring minimal tool requirements while delivering functional results when properly executed. This technique involves joining wood pieces end-to-end or edge-to-edge, relying primarily on adhesive and mechanical fasteners for strength.
Use 1/2″ wire brads when nailing through the sides of the front/back panels into 1/4″ plywood, and use 1″ wire brads when nailing into the bottom panel. This specific fastener sizing prevents splitting while providing adequate holding power for typical storage applications.
Pre-drilling pilot holes prevents wood splitting, particularly important when working near board edges or with hardwood species. Pilot hole diameter should equal approximately 85% of screw shaft diameter for optimal holding power without creating oversized holes that reduce joint strength.
Glue application technique significantly impacts joint strength and appearance. Apply adhesive evenly to both mating surfaces, avoiding excess that creates messy squeeze-out requiring cleanup. Clamping pressure should be sufficient to close gaps without excessive force that starves joints of adhesive.

Intermediate Box Joint Techniques
Box joints provide dramatically improved strength and visual appeal compared to simple butt joints, while remaining achievable for intermediate-level builders with basic power tools. There are two common ways to make box joints with a router, either with a handheld router or a router table, offering flexibility for different workshop setups.
I don't do any measuring when I make box joint joinery. Everything is by eye. I use a stop block on my table saw sled and flip the board from side to side, so that no matter what I do, my joints are equal on the top and bottom of the box. This approach simplifies layout while ensuring consistent joint spacing across all box faces.
Proper joint sizing requires fingers approximately equal to material thickness for optimal strength-to-appearance balance. Wider fingers provide greater glue surface but may appear coarse on small wooden storage boxes. Conversely, narrow fingers create elegant appearance but require greater precision and patience during construction.
Test joints on scrap material before cutting final pieces, allowing technique refinement without risking project materials. Small adjustments to jig setup can dramatically improve fit quality, making practice cuts a worthwhile investment in final results.

Advanced Dovetail Construction Methods
Dovetail joints represent the pinnacle of wooden storage box construction, providing exceptional strength while showcasing advanced craftsmanship skills. The interlocking wedge design creates mechanical strength that improves over time as wood movement tightens joints naturally.
Hand-cut dovetails require significant practice but offer unlimited customization in spacing, angles, and proportions. Traditional ratios suggest 1:8 slopes for softwoods and 1:6 for hardwoods, though personal preference and aesthetic considerations may justify variations. Sharp tools and careful layout are absolutely critical for successful hand-cut results.
Router-based dovetail jigs enable consistent results with less skill development, though limiting design flexibility compared to hand-cutting approaches. Quality jigs produce precise joints suitable for professional applications, making them valuable investments for builders constructing multiple wooden storage chests.
The key to successful dovetails lies in precise layout and patient execution. Rushing any aspect typically results in poor fits requiring extensive correction or complete re-cutting. However, well-executed dovetails create joints lasting decades with minimal maintenance.

Construction Technique Comparison Analysis
| Technique | Skill Level Required | Tool Investment | Strength Rating | Appearance Quality | Time Investment | Best Applications |
|---|---|---|---|---|---|---|
| Butt Joints | Beginner | Low ($50-150) | 6/10 | 5/10 | 2-4 hours | Practice projects, painted finishes |
| Dado Joints | Intermediate | Medium ($200-400) | 8/10 | 7/10 | 4-6 hours | Shelved storage boxes, utility applications |
| Box Joints | Intermediate | Medium ($150-300) | 9/10 | 8/10 | 6-8 hours | Custom wooden storage boxes |
| Dovetails (Machine) | Advanced | High ($300-600) | 10/10 | 9/10 | 8-12 hours | Premium decorative storage |
| Dovetails (Hand) | Expert | Low ($100-200) | 10/10 | 10/10 | 12-20 hours | Heirloom pieces, showpieces |
Wood Species Selection for DIY Projects
| Species | Workability | Cost Index | Durability | Finishing Ease | Beginner Friendly | Best Project Types |
|---|---|---|---|---|---|---|
| Pine | Excellent | 3/10 | Fair | Excellent | Yes | Learning projects, painted boxes |
| Poplar | Very Good | 4/10 | Good | Very Good | Yes | Intermediate projects, stained finishes |
| Oak | Good | 8/10 | Excellent | Good | No | Heavy-duty storage, heirloom pieces |
| Maple | Good | 7/10 | Very Good | Excellent | No | Fine furniture, natural finishes |
| Cedar | Very Good | 6/10 | Very Good | Good | Yes | Outdoor projects, clothing storage |
| Walnut | Fair | 9/10 | Very Good | Excellent | No | Premium projects, natural beauty |
How Do You Optimize Dimensions and Design for Maximum Storage Efficiency?
Dimensional optimization represents a critical aspect of wooden storage box design, significantly impacting both functionality and material efficiency. Proper sizing considerations extend beyond simple volume calculations to encompass access requirements, structural limitations, and intended storage applications.
Volume-to-Surface Area Optimization
Mathematical relationships between box dimensions directly influence material costs and structural requirements. Cubic storage boxes (equal length, width, and height) provide maximum volume for given surface area, minimizing material costs while maximizing storage capacity. However, practical considerations often favor rectangular proportions for improved access and stability.
The golden ratio (1:1.618) provides aesthetically pleasing proportions widely regarded as visually appealing across cultures. Applying this ratio to wooden storage box dimensions creates naturally attractive pieces that integrate seamlessly with existing furniture. Length-to-width ratios following golden proportion guidelines typically measure 1.618:1, with height adjustments based on functional requirements.
Wall thickness significantly impacts internal volume while affecting structural integrity. Thin walls maximize internal space but may lack strength for heavy contents or stacking applications. Conversely, thick walls provide excellent durability but reduce storage efficiency. Optimal thickness typically ranges from 3/4" for small decorative boxes to 1-1/2" for large utility applications.

Access and Ergonomic Considerations
Lid design significantly influences usability, particularly for frequently accessed wooden storage boxes. Hinged lids provide convenient access while maintaining contents security, though requiring adequate clearance above the box for full opening. Piano hinges distribute loads evenly, preventing warping or binding in large lids.
Handle placement affects lifting comfort and safety, particularly crucial for large wooden storage boxes containing heavy items. Recessed handles maintain clean appearances while preventing snagging, though requiring router capabilities for creation. Rope handles offer traditional aesthetics while providing comfortable grips for moderate loads.
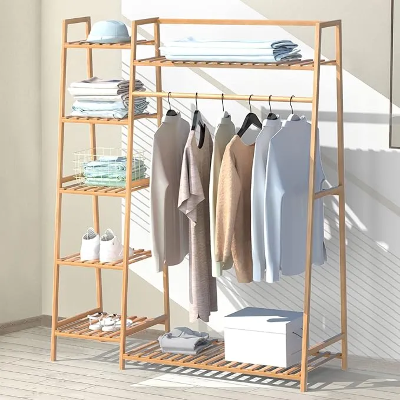
Internal organization features maximize storage efficiency while improving accessibility. Removable dividers enable customization for varying contents, while fixed compartments provide permanent organization. Tray systems create layered storage, particularly valuable for small items requiring easy identification.

Structural Integrity Requirements
Load-bearing calculations determine minimum structural requirements for intended applications. Bottom panels require adequate thickness and support to prevent sagging under load, particularly important for books, tools, or other dense items. Cross-grain construction or plywood substrates provide superior strength compared to solid wood panels with parallel grain orientation.
Corner joint selection significantly impacts overall box strength and durability. Simple butt joints may suffice for light-duty applications but lack strength for heavy contents or frequent handling. Mechanical joints like dadoes or rabbets provide substantially improved strength while remaining achievable for intermediate builders.
Reinforcement strategies can transform lightweight construction into robust storage solutions. Corner brackets, either metal or wooden, significantly improve joint strength while adding minimal weight or complexity. Bottom cleat systems distribute loads effectively while enabling easy attachment of casters or feet.

What Are the Critical Steps for Professional-Quality Finishing?
Surface preparation and finishing represent the difference between amateur and professional results, regardless of construction quality. Proper finishing enhances both appearance and durability while protecting wood from moisture, wear, and environmental damage.
Surface Preparation Fundamentals
Sanding progression significantly impacts final finish quality, requiring systematic advancement through increasingly fine grits. Starting with 120-grit paper removes machine marks and minor surface imperfections, while 150-grit eliminates sanding scratches from previous steps. Final 220-grit sanding creates smooth surfaces that accept stains and finishes uniformly.
Grain direction consistency during sanding prevents cross-grain scratches that become visible under finish. Always sand parallel to wood grain, avoiding circular or random motions that create permanent marks. Between-coat sanding with 320-grit paper creates smooth surfaces while providing adequate adhesion for subsequent coats.
Dust removal between sanding stages prevents contamination that creates surface defects in final finishes. Compressed air effectively removes dust from crevices and joints, while tack cloths capture fine particles without introducing residues. Clean workshop environments significantly improve finish quality by reducing airborne contamination.

Stain Selection and Application
Stain selection depends on desired color, wood species characteristics, and finish system compatibility. Oil-based stains penetrate deeply while providing excellent color saturation, though requiring longer drying times and adequate ventilation. Water-based alternatives dry quickly with minimal odor but may raise grain requiring additional sanding.
Pre-conditioner application ensures uniform stain absorption, particularly important for softwoods like pine that otherwise accept stain unevenly. This additional step prevents blotchy appearance common in amateur finishing, creating professional results worth the extra effort and expense.
Application technique significantly influences final appearance, with consistency being paramount. Work sections small enough to maintain wet edges, preventing overlap marks that create color variations. Wipe excess stain promptly to prevent over-penetration that creates dark areas difficult to correct.

Protective Finish Systems
Polyurethane finishes provide excellent durability and moisture resistance, ideal for wooden storage boxes in demanding environments. Oil-based polyurethane offers superior hardness and chemical resistance, while water-based variants provide clarity and fast recoating times with reduced environmental impact.
Application requires careful attention to environmental conditions, with temperature and humidity significantly affecting flow and curing characteristics. Ideal conditions range from 65-75°F with relative humidity below 50% for optimal results. High humidity can cause blushing or slow curing, while excessive heat creates application difficulties.
Multiple thin coats provide superior results compared to fewer thick applications. Three coats typically provide adequate protection for most wooden storage box applications, with light sanding between coats using 320-grit paper. Final coats may benefit from higher grit sanding (400-600) for ultra-smooth surfaces.

Finishing Options and Performance Comparison
| Finish Type | Durability | Application Ease | Drying Time | Environmental Impact | Cost | Best Applications |
|---|---|---|---|---|---|---|
| Polyurethane (Oil) | Excellent | Good | 8-12 hours | Moderate | Medium | High-wear surfaces, outdoor use |
| Polyurethane (Water) | Very Good | Excellent | 2-4 hours | Low | Medium-High | Indoor projects, quick turnaround |
| Lacquer | Good | Fair | 30 minutes | High | Medium | Production finishing, sprayed application |
| Shellac | Fair | Good | 1-2 hours | Very Low | Low | Traditional restoration, quick projects |
| Tung Oil | Fair | Excellent | 24-48 hours | Very Low | Low | Natural appearance, easy maintenance |
| Danish Oil | Good | Excellent | 8-12 hours | Low | Low-Medium |
Mixed penetrating/surface protection |
How Can You Troubleshoot Common Construction Problems?
Construction challenges inevitably arise during wooden storage box projects, making problem-solving skills essential for successful completion. Understanding common issues and their solutions prevents project abandonment while building troubleshooting confidence for future endeavors.
Joint Fit Problems and Solutions
Poor joint fit represents the most common construction challenge, typically resulting from measurement errors, cutting inaccuracies, or wood movement. Gaps in joints compromise both strength and appearance, requiring careful correction to achieve acceptable results.
Oversized joints often result from dull cutting tools or improper technique, creating loose fits that lack structural integrity. Shimming with thin wood strips or veneer can restore proper fit, though this approach requires careful matching to avoid visible patches. Alternatively, wood filler mixed with sanding dust creates nearly invisible repairs when properly color-matched.
Undersized joints prevent proper assembly, requiring material removal for correction. Sharp chisels enable precise adjustments without damaging surrounding areas, though patience and light cuts prevent over-correction. Test-fitting frequently during adjustment prevents removing too much material.
Wood movement from moisture changes can dramatically affect joint fit, particularly problematic during seasonal transitions. Allowing materials to acclimate to workshop conditions before construction minimizes movement-related problems. Storing materials in consistent temperature and humidity conditions for 1-2 weeks stabilizes dimensions.

Alignment and Square Issues
Out-of-square construction creates functional and aesthetic problems, making careful measurement and adjustment essential throughout assembly. Diagonal measurements should be equal for rectangular boxes, indicating proper square alignment. Discrepancies require careful analysis to identify and correct root causes.
Clamping technique significantly influences final alignment, with excessive pressure potentially pulling assemblies out of square. Use adequate clamps to close joints without over-tightening that distorts components. Clamp placement should distribute pressure evenly while maintaining proper alignment.
Jigs and fixtures can prevent alignment problems by maintaining proper relationships during assembly. Simple corner clamping jigs ensure square assembly while freeing hands for adjustment and fastener installation. Investment in quality squares and measuring tools pays dividends in improved accuracy.
Surface Defect Remediation
Surface imperfections from handling, tool marks, or assembly damage require careful correction to achieve professional results. Scratches, dents, and gouges each require different repair approaches based on severity and location.
Light scratches often disappear during sanding progression, making assessment before extensive repair attempts worthwhile. However, deep scratches may require wood filler application before final sanding. Color-matched fillers minimize visibility in natural finishes.
Dents in solid wood can often be raised using steam and heat, avoiding filler requirements. Place damp cloth over the dent and apply hot iron briefly, allowing steam to swell compressed wood fibers. Multiple applications may be necessary for complete correction.
Tear-out from power tools requires careful repair to avoid visible patches in finished pieces. Sharp chisels can often remove damaged areas cleanly, though this approach reduces final dimensions slightly. Alternatively, careful sanding with progressively finer grits can minimize tear-out visibility.

Cost Analysis: DIY vs. Commercial Wooden Storage Boxes
| Box Size Category | Commercial Price Range | DIY Material Cost | DIY Labor Hours | Total DIY Investment | Savings Percentage | Quality Comparison |
|---|---|---|---|---|---|---|
| Small Decorative (1 cu ft) | $75-$200 | $25-$45 | 6-8 hours | $65-$125 | 35-45% | Superior customization |
| Medium Storage (3 cu ft) | $150-$400 | $45-$85 | 8-12 hours | $125-$245 | 25-40% | Comparable to premium commercial |
| Large Storage (8 cu ft) | $300-$800 | $75-$150 | 12-16 hours | $235-$390 | 30-50% | Superior material quality possible |
| Custom Designs | $400-$1200 | $100-$200 | 15-25 hours | $325-$575 | 35-55% | Complete customization control |
Labor valued at $25/hour for hobby woodworker time investment
Advanced Techniques for Expert-Level Results
Experienced builders can incorporate advanced techniques that distinguish custom work from commercial alternatives. These methods require significant skill development but create truly exceptional results warranting the additional effort and complexity.
Hand-Cut Traditional Joinery
Traditional hand-cut joinery represents the pinnacle of woodworking craftsmanship, creating joints of exceptional strength and beauty. Dovetail joints, when properly executed, provide mechanical strength that actually improves over time as wood movement tightens the interlocking design.
The process begins with careful layout using traditional marking gauges and dovetail squares, ensuring consistent angles and proportions across all joints. Sharp hand tools are absolutely essential, with proper chisel sharpening techniques being fundamental skills for successful results.
Cutting technique requires patience and precision, with the adage "measure twice, cut once" being particularly relevant. Small adjustments during fitting create perfect joints, while rushing typically results in poor fits requiring extensive correction or complete re-cutting.

Complex Curved and Compound Cuts
Advanced wooden storage box designs may incorporate curved elements, compound angles, or sculptural details that distinguish custom work from basic rectangular construction. These techniques require specialized tools and considerable skill development but create unique pieces of exceptional visual appeal.
Band saw capabilities enable curved cuts that add organic flowing lines to otherwise geometric designs. Template-guided cutting ensures consistency across multiple identical pieces while enabling complex shapes beyond freehand capabilities. Proper blade selection and cutting technique prevent drift and tear-out common in curved cutting.
Steam bending techniques allow creation of curved wooden elements impossible through cutting alone. This traditional technique requires careful moisture and temperature control but enables organic curved forms that complement rigid storage box geometry. Success requires understanding wood species behavior and proper bending form construction.

Conclusion: Mastering the Art of DIY Wooden Storage Box Construction
The DIY wooden storage box market continues expanding as consumers seek customizable, sustainable storage solutions that reflect personal craftsmanship values. The market for wooden boxes is valued at a whopping USD 4.30 billion as of 2024, with more and more companies making the switch to boxes for packaging materials due to their aesthetic appeal, the market is slated to reach USD 5.80 billion.
Success in wooden storage box construction requires systematic approach development, beginning with realistic skill assessment and appropriate project selection. Beginning builders should focus on simple construction techniques while developing fundamental skills, gradually progressing to advanced methods as confidence and capabilities improve.
Material selection significantly impacts both construction difficulty and final results, making informed choices essential for project success. Quality tools, properly maintained, enable consistent results while improving safety and work enjoyment. Investment in fundamental tools like sharp chisels, reliable squares, and quality clamps pays dividends across multiple projects.
The satisfaction derived from creating functional furniture pieces tailored to specific needs cannot be quantified in purely economic terms. DIY wooden storage box construction provides valuable skill development while creating customized solutions unavailable through commercial channels. These projects serve as stepping stones toward more ambitious woodworking endeavors while delivering immediate functional benefits.
Future trends suggest continued growth in customizable storage solutions, with DIY approaches offering optimal flexibility for meeting evolving needs. The skills developed through wooden storage box construction transfer directly to other furniture projects, making these foundational learning investments with long-term value.
References and Citations
Verified Market Reports. (2024). Storage Boxes Market Size, Share, Scope, Trends And Forecast 2030. Retrieved from https://www.verifiedmarketreports.com/product/storage-boxes-market-size-and-forecast/
Persistence Market Research. (2025). U.S. Kids Storage Furniture Market Size & Share, 2032. Retrieved from https://www.persistencemarketresearch.com/market-research/us-kids-storage-furniture-market.asp
Future Market Insights. (2024). Wooden Boxes Market Growth & Industry Insights 2024-2034. Retrieved from https://www.futuremarketinsights.com/reports/wooden-boxes-market
A Beautiful Mess. (2023). How to Make Your Own Custom Plywood Storage Box. Retrieved from https://abeautifulmess.com/how-to-make-custom-plywood-storage-boxes/
Saws on Skates. (2022). How to Make Box Joints (3 Easy Ways). Retrieved from https://sawsonskates.com/how-to-make-box-joints/
Newton Makes. (2021). Stupid Simple Box Joints. Retrieved from https://www.newtonmakes.com/blog/simpleboxjoints
The Home Depot. (2023). How to Make Wood Joints. Retrieved from https://www.homedepot.com/c/ah/how-to-make-wood-joints/9ba683603be9fa5395fab9017c276c18
Family Handyman. (2023). How to Make a DIY Box Joint Jig. Retrieved from https://www.familyhandyman.com/project/how-to-make-a-box-joint-jig/
Instructables. (2018). Making Wooden Boxes With Box Joints. Retrieved from https://www.instructables.com/Making-Wooden-Boxes-With-Box-Joints/
DIY Data. Timber joints - simple joints for box construction. Retrieved from https://www.diydata.com/carpentry/timber-joints/box-joints/box-joints.php
Footnotes
¹ CAGR (Compound Annual Growth Rate): Statistical measure of growth rate over multiple time periods, accounting for compounding effects in market expansion calculations.
² Box Joints: Interlocking rectangular cuts creating finger-like joints that provide strong mechanical connections and attractive appearance in wooden box construction.
³ Dovetail Joint: Traditional woodworking joint featuring interlocking wedge-shaped cuts that create exceptionally strong mechanical connections improving over time through wood movement.
⁴ Grain Direction: The orientation of wood fibers, significantly impacting strength characteristics and finishing results in wooden construction projects.
⁵ Pre-Conditioner: Wood treatment applied before staining to ensure uniform absorption and prevent blotchy appearance, particularly important for softwood species.
⁶ Router Jig: Precision guide system enabling repeatable cuts and joint creation using handheld or table-mounted routers for consistent results.
⁷ Mortise and Tenon: Traditional joint featuring rectangular hole (mortise) receiving corresponding projection (tenon) for strong mechanical wood connections.
⁸ Tack Cloth: Specialized lint-free cloth designed for removing fine dust particles between finishing coats without introducing contamination or residue.`